Homemade Yogurt
July 17, 2017
Some of you may remember last year’s infamous yogurt-making experiment in Mr. Whitehead’s AP Language and Composition classes. I was one of the students involved, and have been since then inspired to make my own yogurt at home.
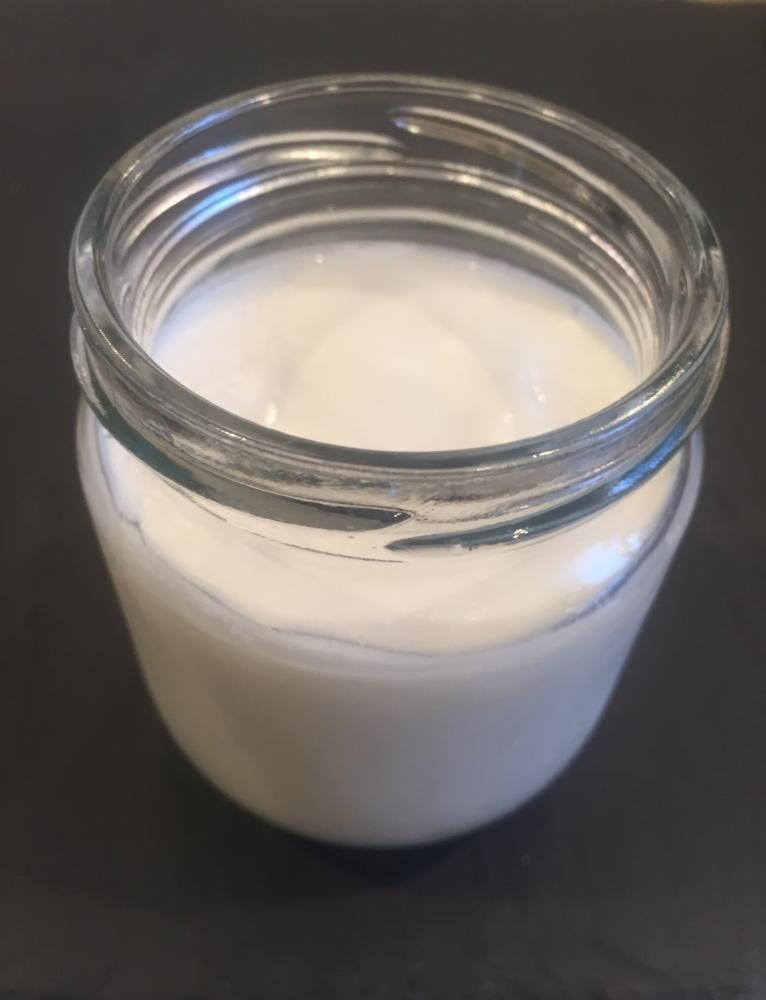
The first time I made my own yogurt, I only incubated it for 8 hours without any flavoring. I ended up with a more liquid, plain yogurt, which I strained through cheesecloth for a few hours to make Greek yogurt, (thicker and higher in protein per serving). With a little bit of lemon zest, garlic, mandolined cucumber and a good amount of dill I transformed the yogurt into a fresh, summery tzatsiki, which my family enjoyed with pita, chicken and pepper kabobs.
Each of us has our own unique set of “good” bacteria – called colonizing microbes – that live in our digestive tract and help to stave off the “bad” type of bacteria, which cause discomfort and infections. It’s a fascinating subject – the types of bacteria specific to our bodies are completely based on diet and region. The character of the bacteria in your gut develops as early as in utero, based on your mother’s diet. Studies have found that the gut bacteria of children in Burkina Faso are better adapted to a plant-based diet of unprocessed foods, very similar to that of their local ancestors, and that Italian children in Florence had gut bacteria adapted to process much richer foods, like bread and cheese and pasta. In essence, you are what you eat.
The goods news is that the gut is extremely elastic – that is, as soon as you change your diet you can shift the bacteria populations in your digestive tract. That’s why eating yogurt is often recommended to patients who have just taken powerful antibiotics (the yogurt meant to replace the bacteria killed off by the medication) or people who are simply suffering from bloating, constipation or general stomach discomfort. The same benefits can be found from fermented foods, including kimchi, miso, sauerkraut and kombucha.
Yogurt is my probiotic of choice – with a little fresh fruit and granola you can’t go wrong. When I can’t make my own, here are a few of my favorite store-bought alternatives. It’s all based on personal preference, so shop around a little to see which brands you prefer, but make sure to look for yogurt with “live and active cultures” – that’s the stuff that’s good for you.

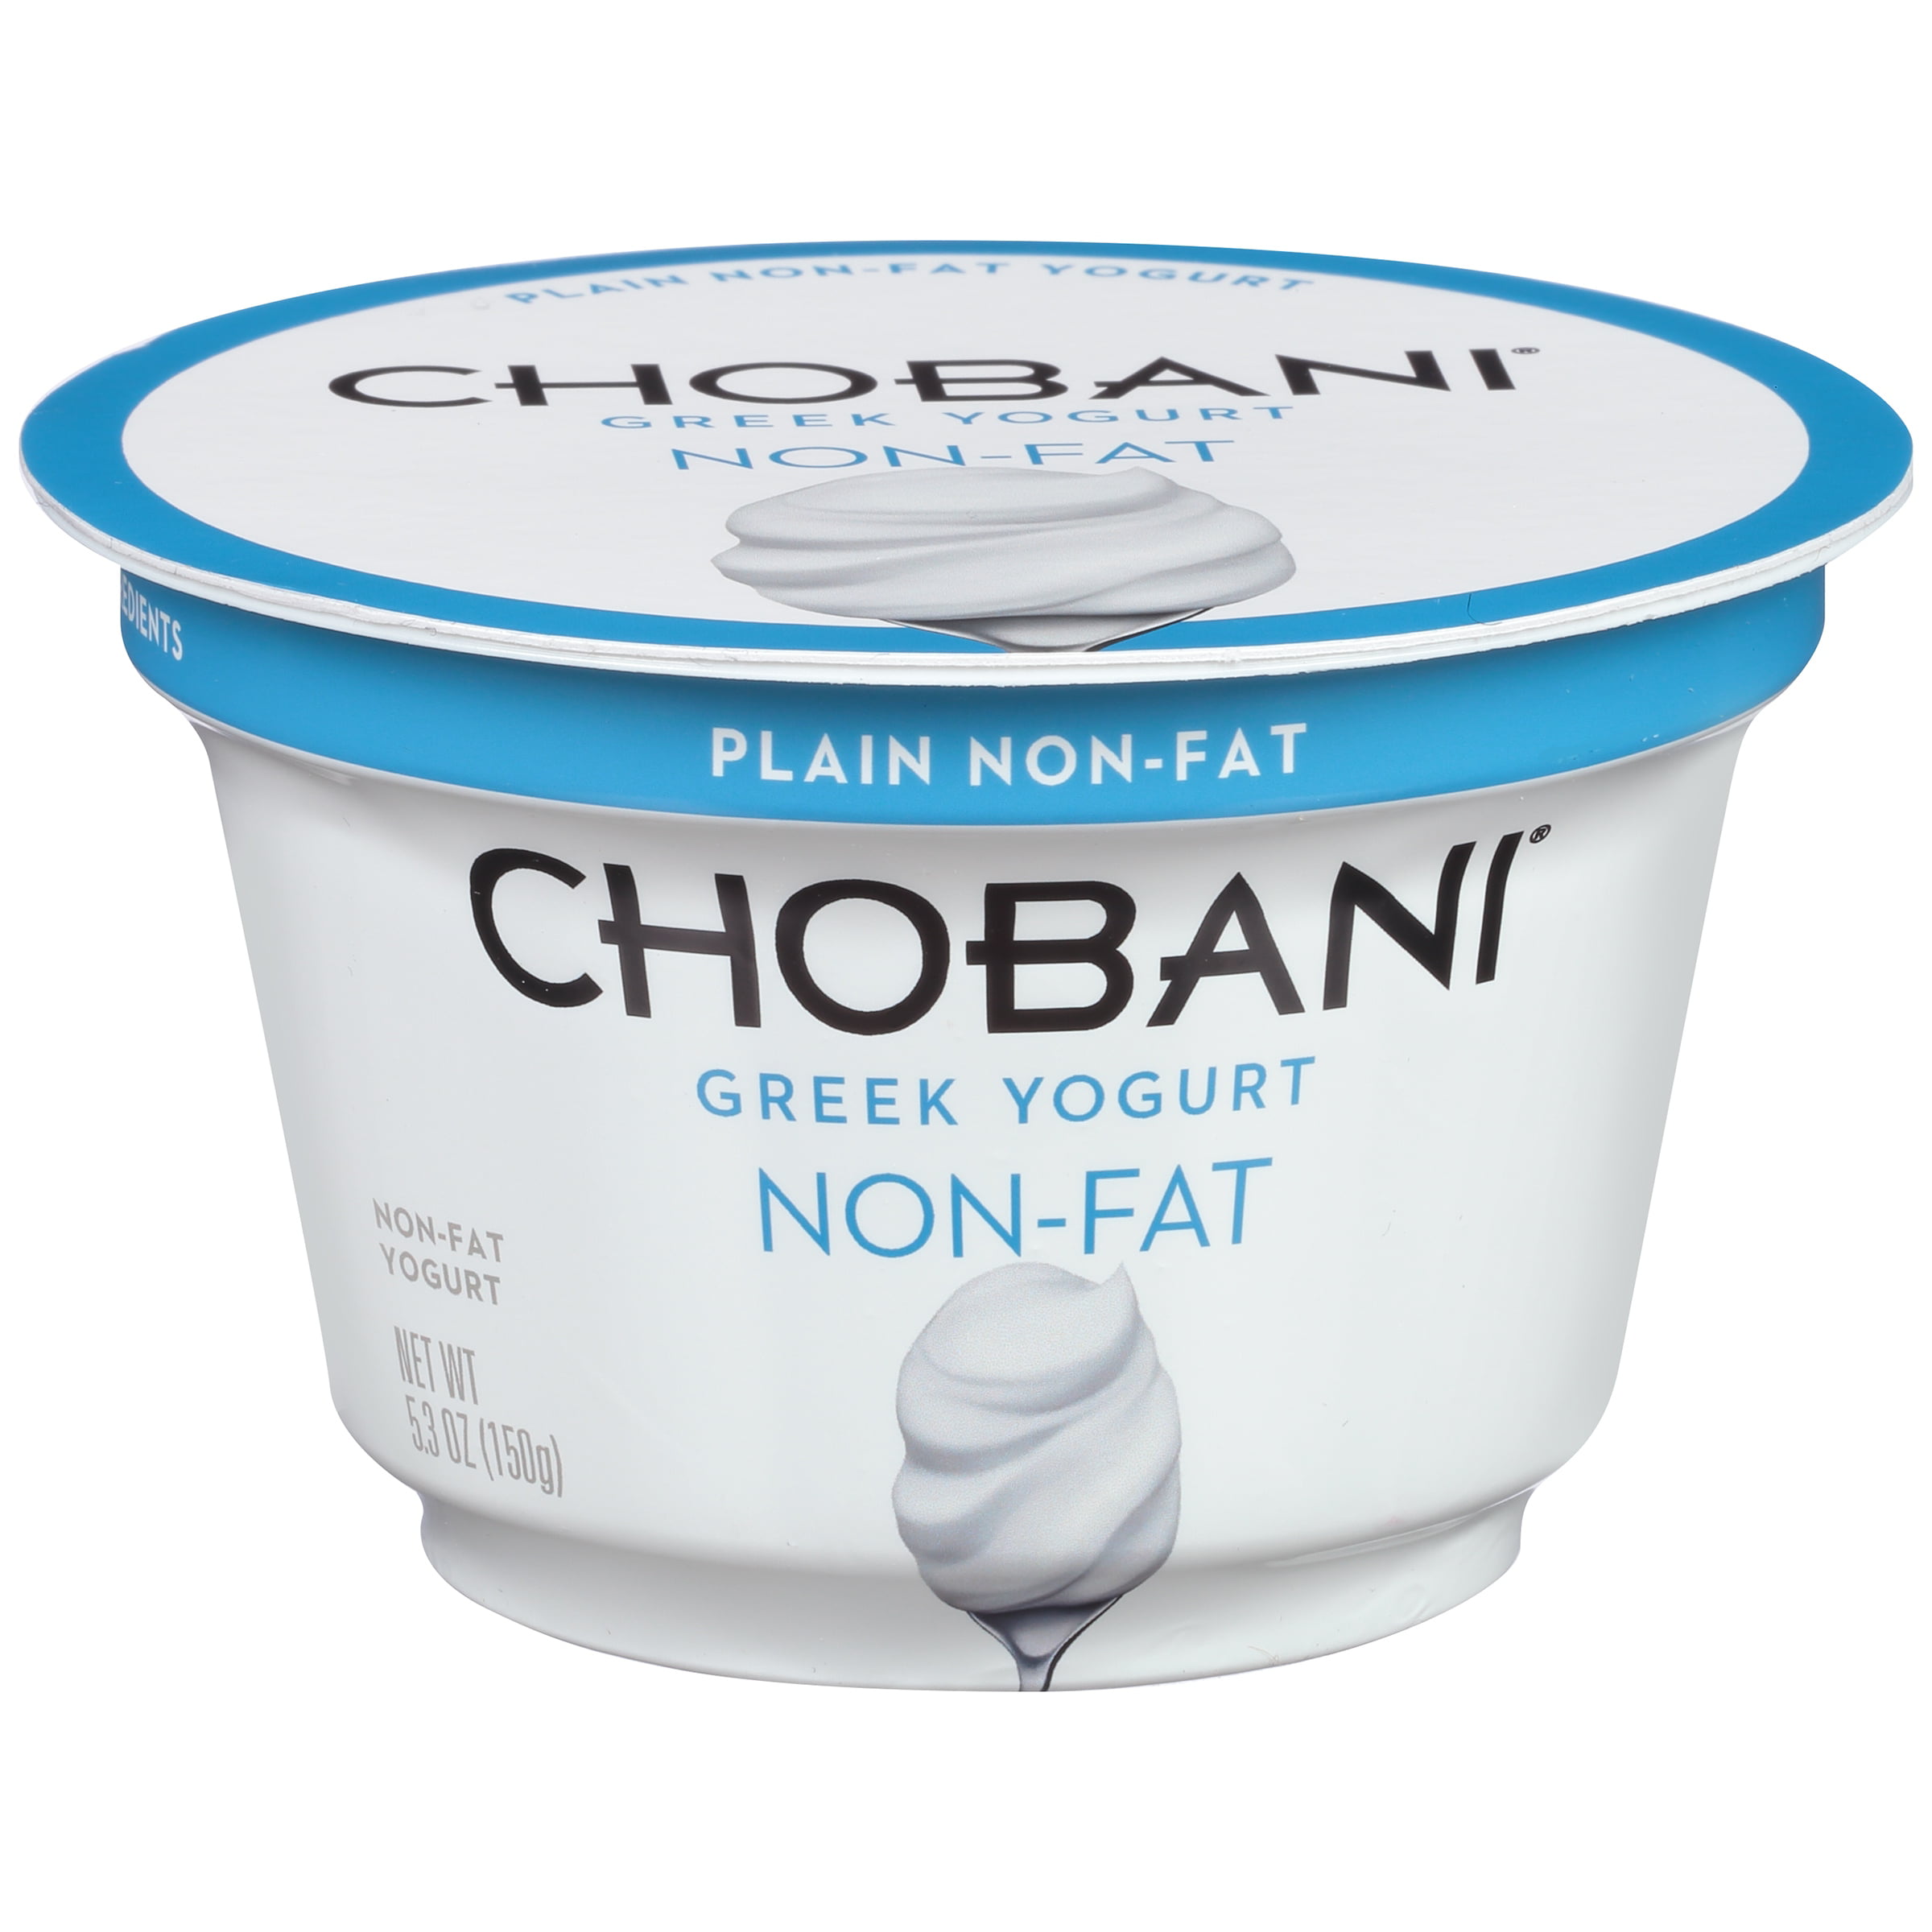
Chobani Non-Fat Plain Greek Yogurt: I love the texture of this yogurt the most out of all the Greek yogurts I’ve tried from the store. Mixed in with a tsp of honey it’s great on its own or with a little fruit and granola mixed in. Chobani’s flips are excellent as well – my favorite is the almond coco-loco.
Source: https://i5.walmartimages.com/asr/2b8eea23-dde7-45cf-9557-392c6bec4a3c_1.dbc0e1ee0a075ad14de4aed4f490f4bf.jpeg
Source: https://target.scene7.com/is/image/Target/14990475_Alt01?wid=520&hei=520&fmt=pjpeg
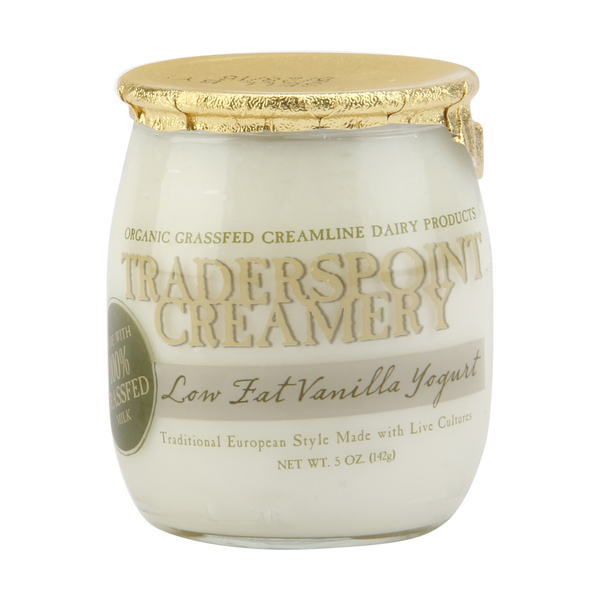
Traderspoint Creamery Low-Fat Vanilla: This is one of my favorite vanilla yogurts – it’s a perfect balance of sweet and tangy. Traderspoint is a European style yogurt (as opposed to Greek), so it’s much less thick. I like it plain or topped with pecan granola.
Source: https://sage.blob.core.windows.net/media/573b34ffcc672fa33dbe1446_traderspoint_lfvanillayogurt.1_thumbnail.jpg

Siggi’s Icelandic Style Skyr: For something very different, try Siggi’s Skyr. It is much, much thicker than any Greek Yogurt on the market and very tangy. Definitely not for everyone, but I’m a fan.
Source: http://siggisdairy.com/wp-content/uploads/2015/11/Vanilla-1-400×400.jpg
Ingredients:
5 cups (1 qt) milk
5 tbsp plain yogurt
1 tbsp vanilla extract
1 tbsp sugar
1 cup ice (for ice bath)
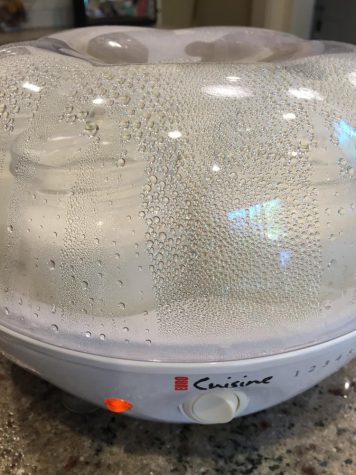
Yogurt Machine**
**I recommend the electric Euro Cuisine Yogurt Maker. It’s not very expensive and it works very well. If you do not own a yogurt machine, you can also incubate the jars under a glass cover (i.e. a large glass bowl to function as a sort of dome) in the oven at 100°F (bread proofing setting) for 10 hours.

Preparation:
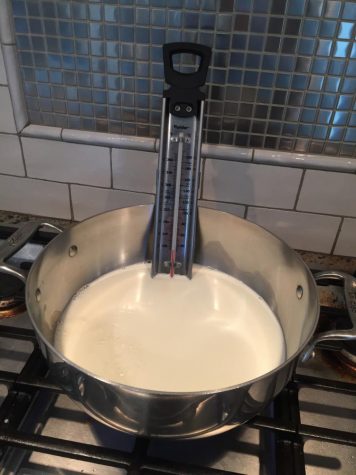
1. Heat the milk in a large pot until it reaches 180°F, stirring frequently to avoid forming a skin. For a thicker yogurt, hold the milk at 180°F for 20 minutes before cooling.
2. Take the milk off of the heat and place the pot in an ice bath to accelerate the cooling process.
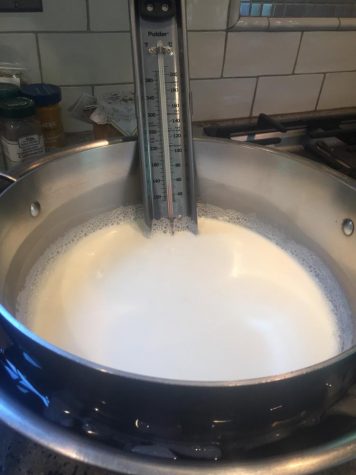
3. Once the milk reaches 95°F, remove from ice bath and dissolve the yogurt, sugar and vanilla. Stir well.
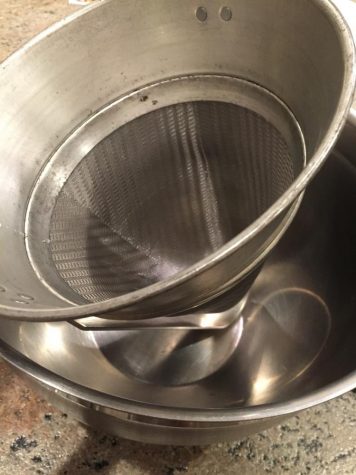
5. Strain milk into a new bowl, then pour into individual yogurt jars.
6. Incubate for 10-12 hours without lids then move jars to the fridge. The longer the yogurt incubates, the thicker and more tart it becomes. Wait a few hours until the yogurt has cooled and enjoy with fresh fruit or granola.